
Make tissue paper pumpkin art – you won’t be disappointed.
I originally thought this tissue paper pumpkin art would be a hit with my three-year-old. The unexpected was that she bailed, and my seven and my almost four-year-old swooped right in!
They were both determined to complete the pumpkin project to its fullest, and now it is hanging on our door. Fall decor win!
Encouraging art at home does a lot for child development
- helps children learn how to focus
- inspires imagination and creativity
- appeals to all of the senses
- increases self-esteem
- encourages a growth mindset
- provides an opportunity for open-ended play
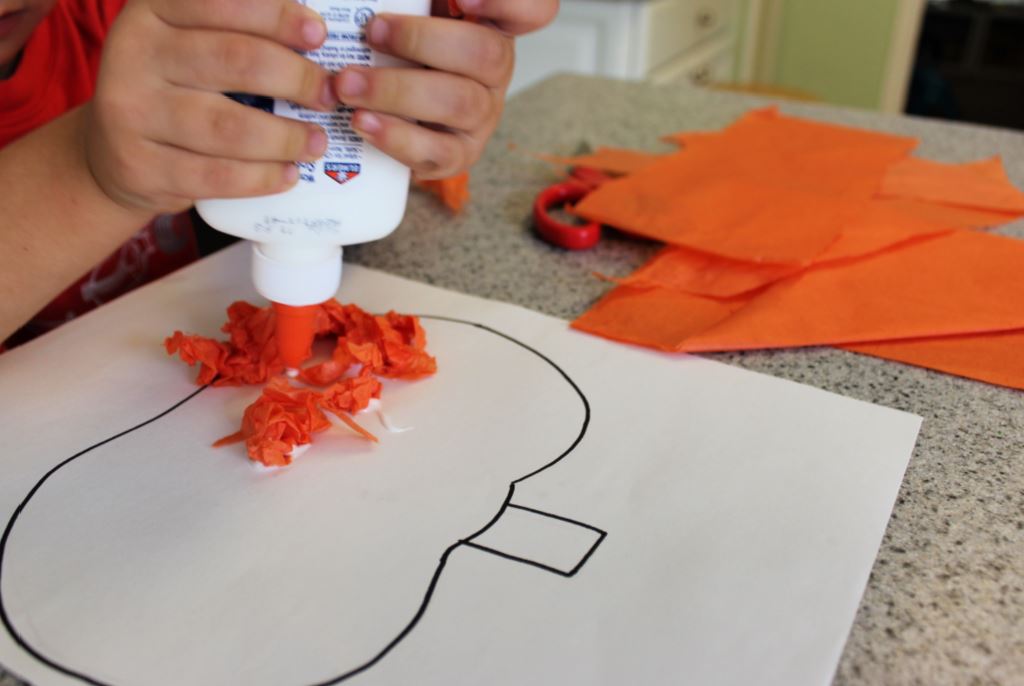
The art process here is simple.
I mixed liquid glue with water at a 50/50 ratio.
It was just enough to keep the glue sticky. The idea is to place the tissue paper on the pumpkin, and then brush over it with the glue/water mixture.
As my kids create, they make sure there isn’t too much water on the brush.
Too much water will cause the paper to crumple. This is why my three-year-old decided to leave. She didn’t yet have the patience for the tissue paper to hold steady as she pants. Your three-year-old may! Try it and see what happens. Every child is different.
You can also crumple the tissue paper (shown below) and glue it to the pumpkin. I found this version to be less messy and easier for the little one.
Prepare for an epic toddler matching game with socks.
This weekend I realized we needed to make a creative sock matching activity for my toddler. This called for a game with socks!
It was time to dive deep into that giant drawer of socks and begin to find their matches.
It was time to take on all those newborn socks and donate them; pass them along to someone that can use them!
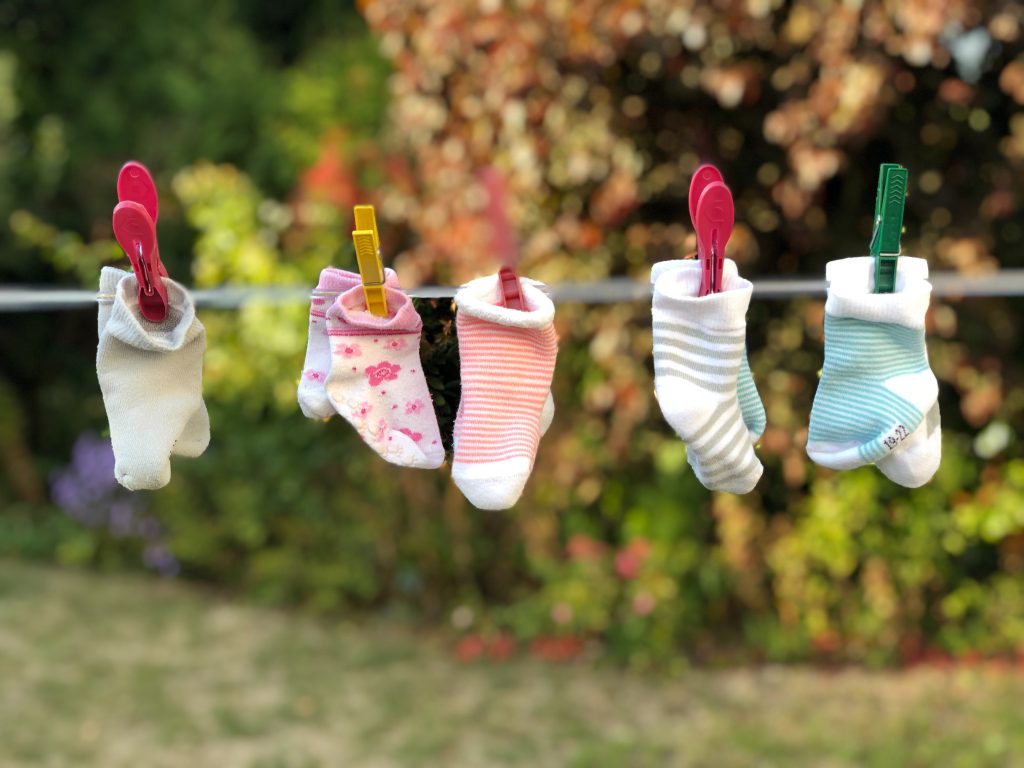

As I dove into that giant heap of socks, I noticed my toddler wanting to help.
The problem was that there were just too many socks for her to pick out the matches.
My three-year-old found herself quickly becoming distracted by jumping into the pile and seeing just how far each one can stretch. Her mind couldn’t focus on finding socks that looked alike even though her interest to help was there.
Fall sensory play is a blast with these beans.
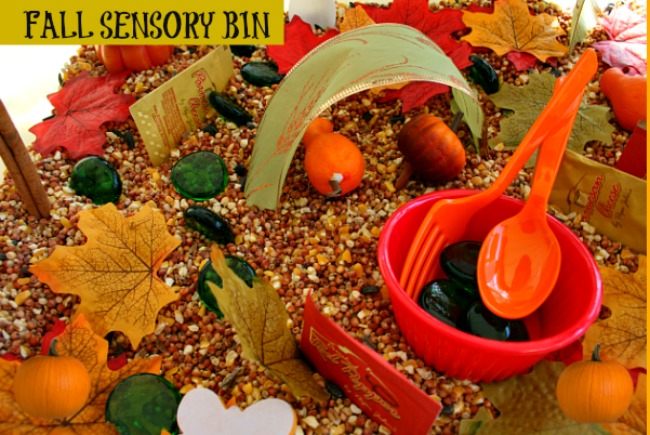
When the two colors collided, it was like a large welcome to the change of seasons. This fall sensory play is the perfect combination of orange and black to kick off September!
How do you teach a toddler how to pour a glass of milk?
How will your preschooler begin to understand capacity?
With simple sensory setups that encourage pouring and scooping, of course!
So many hidden gems to this fall sensory bean bin.
For starters, think about how the weight of a container changes as it is filled with beans.
As my preschooler fills and dumps, the capacity changes, and her mindset shifts.
And guess what? You do not have to race out the door to your grocery store.
Here I added in pinto beans for orange(ish) and black beans for black. Mix them for the ultimate fall sensory idea for preschoolers.
Now, I truly only have one rule for this fall sensory bin.
Here, things need to either be kept wet or dry. I don’t allow water on beans or rice because these supplies need to be swept up after playing. Water will make that really tricky.
Keeping the beans dry helps with cleanup. I sweep away when finished, and it is less likely to have beans sprouting from the cracks of the deck. #momwin
Pumpkin Slime with a Real Pumpkin
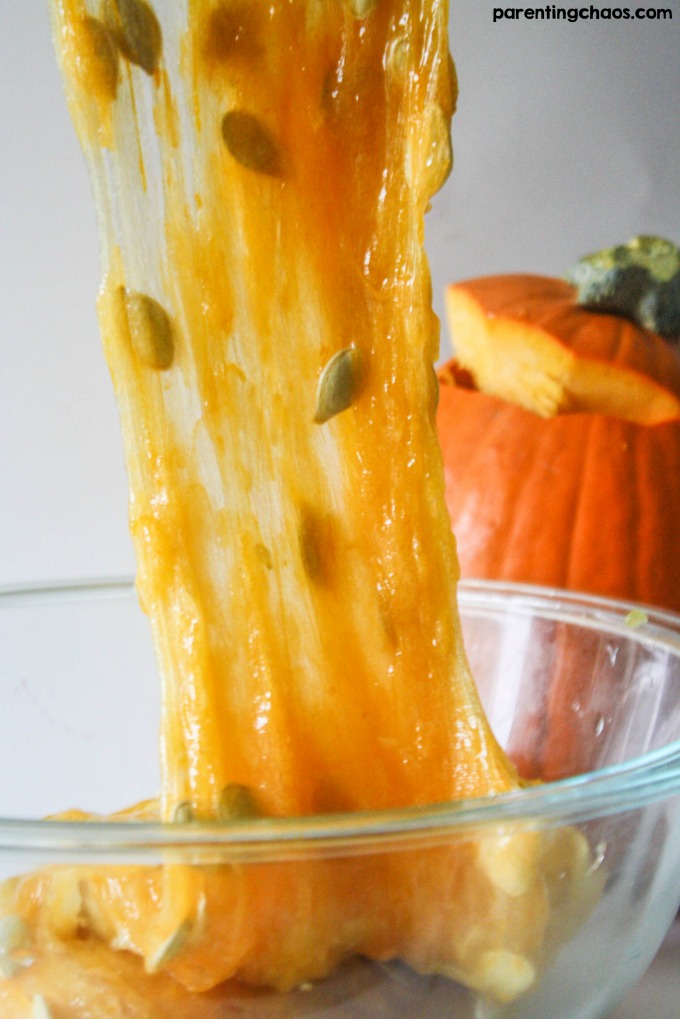
Pumpkin slime in a pumpkin made from pumpkin guts! I wish I had done this sooner. At the first hint of the Fall season, this pumpkin slime has been top on my list, and we have been just waiting for pumpkins to come out in stores.
Check out our slime recipe below for how to make pumpkin slime quickly and easily. Stop at the grocery store for the ingredients and you have a great activity for your kiddos to enjoy!
BEST PUMPKIN SLIME
This little pumpkin has been patiently sitting and waiting as well as my son who loves to make slime. Make pumpkin slime in 5 minutes or less with any of our classic homemade slime recipes!
Here, I have used my favorite slime recipe! Liquid Starch Slime is quick and easy to make, and we have found so many fun themes to add with it. Trust me, it’s easy!
HOW TO MAKE PUMPKIN SLIME
SLIME MAKING TIP: We always recommend kneading your slime well after mixing. Kneading the slime really helps to improve it’s consistency. The trick with liquid starch slime is to put a few drops of the liquid starch onto your hands before picking up the slime.
You can knead the slime in the bowl before you pick it up as well. This slime is stretchy but can be stickier. However, keep in mind that although adding more liquid starch reduces the stickiness, it will eventually create a stiffer slime.
Enjoy playing with your pumpkin slime! Wash hands thoroughly when you finished playing with your homemade slime recipe. Also make sure to wipe down surfaces thoroughly.
I am sure this slime will last a few days but will probably not be something you want to keep for very long.


0 Comments